
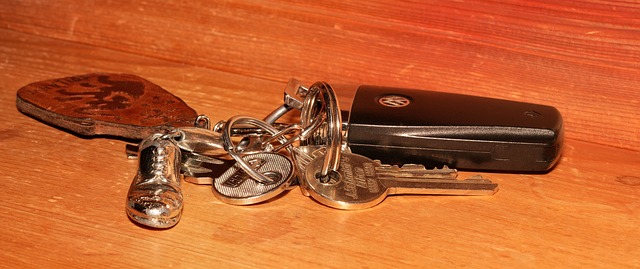
Replacing the battery in your key fob is a straightforward DIY task that can save you money and avoid the need for professional services. Before starting, ensure you understand your specific key fob model by consulting the user manual or online resources to identify the battery type and its location. These batteries are usually found in accessible areas like the back or beneath a removable panel. Use basic tools to carefully remove the old battery, dispose of it responsibly, and install the new one, ensuring proper alignment and secure placement. Test all functions of your key fob after replacement to confirm that everything is working correctly, including locking and unlocking doors, trunk release, panic button, and other specific features. If any issues arise, check for common problems like incorrect battery installation or short circuits due to residual battery acid, which can be cleaned with a soft cloth. Regular testing can help detect early signs of battery depletion, ensuring your key fob remains functional and secure. Remember to handle the new battery with care and have a backup key or alternative locking method available in case of difficulties during the replacement process.
When your car key fob’s functionality dwindles, it’s often a simple matter of replacing its battery. This guide provides five straightforward steps to perform a DIY fob battery replacement, ensuring you can extend your key fob’s life without visiting a dealership. We’ll cover understanding your key fob’s battery type and location, essential precautions, and a detailed, step-by-step process to safely replace the battery. Additionally, we’ll guide you through testing your key fob post-replacement and addressing typical issues that may arise. With these tips in hand, replacing the battery in your key fob becomes a hassle-free task, saving both time and money.
- Understanding Your Key Fob: Identifying the Battery Type and Location
- Precautions to Take Before Attempting DIY Key Fob Battery Replacement
- Step-by-Step Guide to Safely Remove and Install a New Battery in Your Key Fob
- Testing Your Key Fob After Battery Replacement and Troubleshooting Common Issues
Understanding Your Key Fob: Identifying the Battery Type and Location
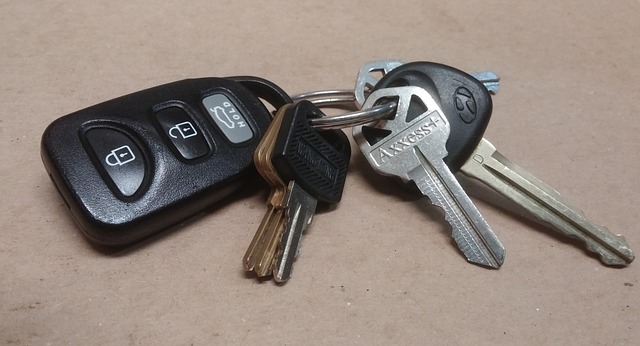
When addressing the task of replacing the battery in your key fob, a foundational step is to gain a comprehensive understanding of your specific model’s design. This involves identifying both the type and location of the battery housed within the fob. Most modern key fobs utilize either a coin cell battery, commonly known as a watch battery, or a small round lithium battery. These batteries are typically found in accessible areas such as the back of the fob or beneath a removable panel, making it more straightforward to execute a DIY replacement. By carefully examining your key fob’s user manual or following online resources specific to your model, you can pinpoint exactly where the battery is located. This step is crucial as it ensures that you do not risk damaging other components of the key fob during the process. Once you have identified the type and location of the battery, you are well-equipped to proceed with the replacement, which involves carefully removing the old battery and installing a new one of the same specifications. This is a task that can be performed with basic tools and without the need for specialized equipment or automotive dealership visits, thus empowering you to maintain your key fob’s functionality at a fraction of the cost of professional services. Remember to handle the batteries with care, as they are sensitive to corrosion and can leak if mishandled, which might cause further damage to your key fob. After completing the replacement, thoroughly test all functionalities of your key fob to ensure that the process was successful and that your vehicle’s security is not compromised.
Precautions to Take Before Attempting DIY Key Fob Battery Replacement
When planning to replace the battery in your key fob as a DIY project, it’s crucial to take several precautions to ensure both your safety and the proper functioning of your key fob afterward. Firstly, consult your vehicle’s owner manual or the key fob’s documentation for specific instructions tailored to your model. This will provide you with necessary details such as battery type, tools needed, and any unique steps required to access the battery compartment without causing damage. Ensure you have the correct battery type specified for your device; using an incorrect battery can lead to improper functioning or even damage the key fob.
Secondly, before proceeding with the battery replacement, gather all necessary tools and components in a safe, well-lit workspace. This typically includes a screwdriver set appropriate for your key fob’s design, new batteries (with the correct specifications), and perhaps a soft cloth to avoid scratching any surfaces during disassembly. Safety glasses are also advisable to protect your eyes from any sharp or loose components that may eject upon opening the casing. Additionally, make sure you have a spare key fob or a way to lock and unlock your vehicle with another method in case the DIY replacement does not go as planned. By taking these precautions, you can mitigate risks and enhance the likelihood of successfully replacing the battery in your key fob. Remember to handle the new batteries with care, avoid short circuiting the terminals, and replace the casing gently to maintain the integrity of your DIY key fob repair.
Step-by-Step Guide to Safely Remove and Install a New Battery in Your Key Fob
Replacing the battery in your key fob is a straightforward task that can be accomplished with minimal tools and expertise. To ensure safety and efficiency, it’s crucial to follow each step carefully. Begin by locating the battery compartment within your key fob. This is typically found by removing any exterior casing that may obstruct access. Use a small screwdriver to gently remove the screws holding the back cover in place. Once the screws are out, carefully detach the back cover and set it aside, taking note of its position for reassembly.
Inside, you will find the battery, which is usually secured by a clip or adhesive. Depress the release tab or cut any adhesive gently to remove the old battery without causing damage to the circuit board. Dispose of the old battery responsibly according to local regulations, as batteries can contain harmful substances. Now, take your new battery and align it with the contacts on the circuit board, ensuring that it’s correctly positioned for optimal conductivity. Secure the new battery in place, either by reapplying adhesive or fastening it with the clip provided. Reattach the back cover, making sure it is firmly secured with the previous screws. Power on your key fob to test functionality; if everything is working as expected, you have successfully replaced the battery in your key fob. Remember to handle the new battery with clean, dry hands and avoid contact with metallic objects to prevent any electrical short circuits during installation.
Testing Your Key Fob After Battery Replacement and Troubleshooting Common Issues

When you’ve successfully replaced the battery in your key fob, it’s imperative to verify its functionality to ensure that all features are working as intended. Begin by attempting to unlock your vehicle with the key fob from a distance, noting if the doors respond as they did prior to battery replacement. If the door remains locked, proceed to test other functions such as the trunk release, panic button, and any additional features specific to your model. Should any of these components fail to operate, retrace your steps in the battery replacement process to identify potential errors, such as incorrect battery placement or a malfunctioning circuit board within the key fob.
If the initial tests show that some functions are responsive but others are not, isolate the non-responsive features. Often, the issue may lie with a short circuit caused by battery residue on the key fob’s circuitry. Gently clean the contacts with a soft cloth to remove any corrosion or debris. Additionally, ensure that the new battery is properly seated in its compartment and that the connections are secure. If problems persist after these troubleshooting steps, consider consulting your vehicle’s owner manual for additional diagnostic procedures or seeking professional assistance. Remember, consistent testing post-replacement can help you identify any early signs of future battery depletion, maintaining the reliability of your key fob.
Replacing the battery in your key fob can be a straightforward task with the right guidance. This article has outlined the essential steps for DIY key fob battery replacement, from comprehending your key fob’s design to safely swapping out the old battery for a new one. By adhering to the precautions and following the step-by-step instructions provided, you can confidently perform this maintenance yourself, saving time and money. After completing the process, ensure to test your key fob to verify its functionality and address any issues that may arise. With these steps in hand, replacing the battery in your key fob need not be a daunting task.