
To replace the battery in your key fob and restore its functionality, carefully follow these steps: locate the battery compartment by disassembling your key fob according to the model's instructions; remove the old battery, taking note of its orientation and polarity for correct replacement; install the new battery with the same orientation as the old one, ensuring it makes full contact with the terminals; reassemble the key fob, avoiding over-tightening of screws; test all buttons and features, including lights and alarm, to confirm everything is working properly. Remember to dispose of the old battery responsibly due to its hazardous contents. If you encounter any issues or if your specific car model requires a programmable key fob, refer to the vehicle's manual or seek professional assistance. Regular testing will help ensure your key fob remains reliable and functional.
Navigating the intricacies of modern vehicle security systems often hinges on maintaining the functionality of your key fob. Whether you’re a car owner looking to tackle this task yourself or seeking insights into professional services, understanding how to replace the battery in your key fob is both empowering and cost-effective. This article delves into the essentials of key fob anatomy, pinpoints common signs of a low battery, and offers a step-by-step guide for DIY battery replacement. Additionally, it highlights frequent pitfalls to avoid, provides tips for prolonging your key fob’s life, and compares professional services with do-it-yourself solutions. With the right knowledge at hand, you can ensure your key fob remains a reliable guardian of your vehicle’s security.
- Understanding Your Key Fob and its Components
- Recognizing Signs of a Low Battery in Your Key Fob
- Step-by-Step Guide to Replace Battery in Key Fob
- – Tools and Materials Needed
- – Locating the Battery Compartment
- – Safely Removing the Old Battery
- – Inserting the New Battery Correctly
- – Testing Your Key Fob After Replacement
Understanding Your Key Fob and its Components
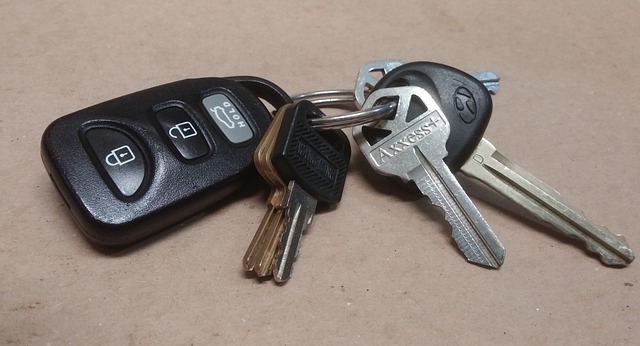
When contemplating the replacement of a battery within your key fob, it’s crucial to first have an intimate understanding of its components. A key fob typically consists of a transmitter, which communicates with your vehicle’s receiver; a button or set of buttons for locking and unlocking the car doors; and a housing that protects these elements. The transmitter transmits a signal to the vehicle when you press the buttons, engaging the mechanisms that secure your vehicle. To ensure successful battery replacement, one must identify the correct battery type required by the fob’s make and model. Most key fobs use a coin-type lithium battery, which is usually found under the key fob’s casing, secured by screws or adhesive. Understanding the precise location and method to access it without causing damage is essential for a hassle-free repair. Additionally, some advanced key fobs may contain additional components such as proximity sensors or LED indicators, which also rely on the battery for functionality. Properly replacing the battery involves carefully opening the casing, removing the old battery, and installing a new one with the correct orientation to avoid polarity issues that could render the fob non-functional. Consulting your vehicle’s owner’s manual or the key fob’s specific instructions can provide guidance tailored to your particular model, ensuring a seamless replacement process for your key fob’s battery.
Recognizing Signs of a Low Battery in Your Key Fob

When your key fob’s performance starts to wane, it may be a sign that the battery is running low. Recognizing early indicators of a low battery is crucial for maintaining the functionality of your vehicle’s security system. Typically, the first sign will be a dimming or reduced intensity of the LED lights on the key fob when you press its buttons. This change in light output can indicate that the battery is discharging and needs to be replaced soon. Another telltale sign is an audible chirp or series of beeps from the key fob, which often occurs when the distance between the fob and the vehicle exceeds the usual range due to weakened battery power. If your key fob requires multiple presses to unlock or lock your vehicle, or if it fails to respond at all, these are clear indications that it’s time to replace the battery in your key fob. To ensure seamless access and security for your vehicle, it’s advisable to address a low battery promptly by replacing the battery in your key fob as recommended by the manufacturer’s guidelines or by consulting a professional. Regular checks of your key fob’s functionality can help you catch these signs early, preventing any inconvenience caused by a sudden loss of key fob performance.
Step-by-Step Guide to Replace Battery in Key Fob
To replace the battery in your key fob, a task that ensures the continued functionality of your vehicle’s security system, follow this step-by-step guide carefully. Begin by obtaining the correct replacement battery, typically a CR2032 lithium coin cell battery, which is commonly used in key fobs due to its small size and long life. Proceed by opening the key fob’s case, which usually involves prying off any external casing with a plastic tool or similar instrument. Note that this process may vary depending on the make and model of your key fob. Once the outer shell is removed, locate the battery compartment, which might be secured with screws. Remove these screws to gain access to the circuit board where the old battery resides.
Carefully extract the old battery, taking note of the correct orientation for the new one. Incorrect placement can lead to improper functioning of your key fob. After placing the new battery in position, ensuring it is seated snugly and making contact with all the necessary terminals, replace the screws to secure the circuit board. Subsequently, reassemble the key fob by aligning and fastening the casing back into place. Ensure that all parts are securely joined, providing both protection for the internal components and ease of use when operating the key fob. Upon completion, test the functionality of your key fob to confirm that the battery replacement was successful. If the buttons respond as expected, your task is complete, and you have successfully replaced the battery in your key fob without the need for professional assistance.
– Tools and Materials Needed

When considering the process of replacing a battery in a key fob, having the right tools and materials is crucial for a successful endeavor. The primary items you’ll need include a small Phillips head screwdriver, a new battery that is compatible with your specific key fob model, and often a clip or tool to remove the old battery. For some models, additional tools such as a key ring puller or a plastic pry tool may be necessary to access the battery compartment. It’s always recommended to refer to your vehicle’s owner manual or the key fob’s service manual for precise instructions on disassembly. Additionally, ensure you work in a well-lit area to avoid any mishaps, and have a flat surface to place your key fob and components as you work.
Before proceeding with the replacement, carefully remove the outer casing of the key fob by unscrewing the screws that hold it together. Be gentle to not damage any internal components. Once the casing is off, locate the battery compartment. This may involve removing a few more screws or simply opening a cover. Use your screwdriver to carefully pry open the battery door without exerting too much force, as some components are delicate. Remove the old battery, being careful not to spill any of the electrolyte, which can corrode other parts of the key fob. Insert the new battery with the correct polarity as indicated in your manual, close the compartment, and reassemble the casing, ensuring all screws are tight but not over-tightened, which could strip the threads or damage internal circuits. After completing the replacement, test the key fob to ensure it functions properly before replacing the casing completely.
– Locating the Battery Compartment

When the buttons on your key fob have stopped responding or the lights have faded, indicating that the battery needs replacement, the first step is to locate the battery compartment. This compartment is typically found within the key fob itself, often at one end or accessible by removing the fob’s casing. To proceed with replacing the battery in your key fob, start by examining the fob for any release tabs, latches, or clips that need to be depressed or unscrewed to open the outer shell. This process may vary depending on the make and model of your key fob, so it’s always a good idea to consult your owner’s manual for specific instructions. Once you’ve accessed the battery compartment, gently remove the old battery and insert the new one, ensuring that it is correctly oriented as per the compartment’s design. Reassemble the key fob carefully to maintain its functionality, and test the buttons to confirm that they are responsive again. If the fob still does not work after replacing the battery, consider checking for any damage to the circuit board or wiring inside the key fob. Remember to handle the new battery with clean, dry hands to avoid contamination, which could lead to premature battery failure. By following these steps, you can successfully replace the battery in your key fob and restore its functionality without needing specialized tools or expertise.
– Safely Removing the Old Battery

When the time comes to replace the battery in your key fob, safety and precision are paramount. Before proceeding, ensure that you have the correct tools on hand, which typically include a small Phillips screwdriver and a prying tool or tweezers. Begin by carefully opening the key fob casing. This often involves unscrewing a few screws around the perimeter of the device. Be gentle to avoid damaging any internal components. Once inside, locate the old battery. It’s usually held in place with a clip or adhesive. Use your tweezers or a similar tool to gently remove the battery clips or peel away the adhesive without applying excessive force that could damage the circuitry. Dispose of the old battery responsibly, as it contains hazardous materials. When inserting the new battery, align it correctly with the positive and negative terminals, as specified in your key fob’s user manual. This ensures optimal functionality and prevents any potential electrical issues. After securely placing the new battery in position and reattaching any clips or adhesive, proceed to reassemble the key fob casing, making sure all parts are tightly secured. Finally, test your key fob to ensure that it is functioning correctly after the replace battery in key fob process. Always refer to the specific instructions for your particular make and model of key fob, as some designs may vary in their disassembly process.
– Inserting the New Battery Correctly

When faced with a key fob that no longer responds due to a depleted battery, the first step is to replace the battery in key fob correctly. This task requires precision and careful handling of the electronic components within. To begin, locate the battery compartment in your key fob. This is typically a small casing on the back or side of the device, held in place by screws or clips. Once you’ve accessed the battery compartment, gently remove the old battery, taking note of the orientation and polarity to ensure the new battery is installed correctly. Proper installation is crucial for the key fob to function properly; incorrect placement can lead to malfunctioning. After removing the old battery, place the new battery in the same orientation as the old one. Press it into place firmly, making sure it is seated correctly against the contacts. Reassemble the key fob, ensuring that all components are securely fastened. Power on the key fob to test if the replace battery in key fob process was successful. If the device responds as expected, your key fob should now be operational with its new battery, restoring access to your vehicle. Always refer to your specific key fob’s manual for manufacturer-specific instructions, as some models may have different procedures or require special tools for disassembly.
– Testing Your Key Fob After Replacement

When your car key fob’s battery dies, it can be a nuisance, rendering your accessory both ineffective and non-responsive. To ensure your vehicle remains accessible, replacing the battery in your key fob is often the best course of action. Upon purchasing a new key fob or replacing the battery within an existing one, testing its functionality is paramount. Begin by trying all buttons to confirm that the lights, alarm, and other features are operating as expected. Next, test the distance range by moving progressively further away from your car while activating the key fob. The effective range should be sufficient for you to unlock your car with ease. If any issues persist, consult your vehicle’s manual or a professional technician to troubleshoot potential problems. Additionally, verify compatibility between your key fob and car model before initiating the replacement process, as some models may require specific types of batteries or specialized programming. Regular testing post-replacement will help you maintain confidence in your key fob’s reliability and ensure that it continues to function optimally for years to come. Remember, when in doubt, refer to the manufacturer’s instructions or seek expert assistance to guarantee the correct battery replacement in your key fob.
When faced with a non-responsive car key fob, knowing how to replace the battery can save time and prevent unnecessary stress. This article has outlined the essential steps to identify a low battery in your key fob, the necessary tools for battery replacement, and a clear guide on safely removing and inserting a new battery. By following these instructions, you can effectively revive your key fob without the need for professional assistance or costly replacements. Remember, replacing the battery in your key fob is a straightforward process that empowers you to maintain the functionality of your car’s security system. Ensure you handle the components with care and adhere to safety precautions as outlined. With these steps in hand, you are now well-equipped to manage this common maintenance task associated with your vehicle’s key fob.